Mongoose Database Name Must Be a String
This browser is no longer supported.
Upgrade to Microsoft Edge to take advantage of the latest features, security updates, and technical support.
- Feedback
- Edit
Tutorial: Build a Node.js and MongoDB app in Azure
- Article
- 17 minutes to read
Thank you.
Azure App Service provides a highly scalable, self-patching web hosting service. This tutorial shows how to create a Node.js app in App Service on Windows and connect it to a MongoDB database. When you're done, you'll have a MEAN application (MongoDB, Express, AngularJS, and Node.js) running in Azure App Service. The sample application uses a combination of Sails.js and Angular 12.
Azure App Service provides a highly scalable, self-patching web hosting service using the Linux operating system. This tutorial shows how to create a Node.js app in App Service on Linux, connect it locally to a MongoDB database, then deploy it to a database in Azure Cosmos DB's API for MongoDB. When you're done, you'll have a MEAN application (MongoDB, Express, AngularJS, and Node.js) running in App Service on Linux. The sample application uses a combination of Sails.js and Angular 12.

What you'll learn:
- Create a MongoDB database in Azure
- Connect a Node.js app to MongoDB
- Deploy the app to Azure
- Update the data model and redeploy the app
- Stream diagnostic logs from Azure
- Manage the app in the Azure portal
If you don't have an Azure subscription, create a free account before you begin.
Prerequisites
To complete this tutorial:
- Install Git
- Install Node.js and NPM
-
Use the Bash environment in Azure Cloud Shell.

-
If you prefer, install the Azure CLI to run CLI reference commands.
-
If you're using a local installation, sign in to the Azure CLI by using the az login command. To finish the authentication process, follow the steps displayed in your terminal. For additional sign-in options, see Sign in with the Azure CLI.
-
When you're prompted, install Azure CLI extensions on first use. For more information about extensions, see Use extensions with the Azure CLI.
-
Run az version to find the version and dependent libraries that are installed. To upgrade to the latest version, run az upgrade.
-
Create local Node.js app
In this step, you set up the local Node.js project.
Clone the sample application
In the terminal window, cd to a working directory.
Run the following command to clone the sample repository.
git clone https://github.com/Azure-Samples/mean-todoapp.git Run the application
Run the following commands to install the required packages and start the application.
cd mean-todoapp npm install node app.js --alter When the app is fully loaded, you see something similar to the following message:
debug: ------------------------------------------------------- debug: :: Fri Jul 09 2021 13:10:34 GMT+0200 (Central European Summer Time) debug: Environment : development debug: Port : 1337 debug: -------------------------------------------------------
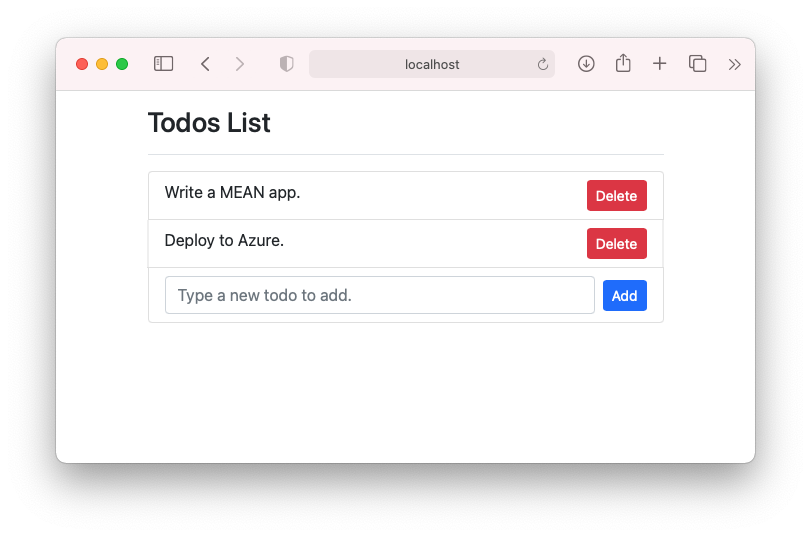
Navigate to http://localhost:1337 in a browser. Add a few todo items.
The MEAN sample application stores user data in the database. By default, it uses a disk-based development database. If you can create and see todo items, then your app is reading and writing data.
To stop Node.js at any time, press Ctrl+C in the terminal.
Create production MongoDB
In this step, you create a MongoDB database in Azure. When your app is deployed to Azure, it uses this cloud database.
For MongoDB, this tutorial uses Azure Cosmos DB. Cosmos DB supports MongoDB client connections.
Create a resource group
A resource group is a logical container into which Azure resources, such as web apps, databases, and storage accounts, are deployed and managed. For example, you can choose to delete the entire resource group in one simple step later.
In the Cloud Shell, create a resource group with the az group create command. The following example creates a resource group named myResourceGroup in the West Europe location. To see all supported locations for App Service in Free tier, run the az appservice list-locations --sku FREE command.
az group create --name myResourceGroup --location "West Europe" You generally create your resource group and the resources in a region near you.
When the command finishes, a JSON output shows you the resource group properties.
Create a Cosmos DB account
Note
There is a cost to creating the Azure Cosmos DB databases in this tutorial in your own Azure subscription. To use a free Azure Cosmos DB account for seven days, you can use the Try Azure Cosmos DB for free experience. Just click the Create button in the MongoDB tile to create a free MongoDB database on Azure. Once the database is created, navigate to Connection String in the portal and retrieve your Azure Cosmos DB connection string for use later in the tutorial.
In the Cloud Shell, create a Cosmos DB account with the az cosmosdb create command.
In the following command, substitute a unique Cosmos DB name for the <cosmosdb-name> placeholder. This name is used as the part of the Cosmos DB endpoint, https://<cosmosdb-name>.documents.azure.com/, so the name needs to be unique across all Cosmos DB accounts in Azure. The name must contain only lowercase letters, numbers, and the hyphen (-) character, and must be between 3 and 50 characters long.
az cosmosdb create --name <cosmosdb-name> --resource-group myResourceGroup --kind MongoDB The --kind MongoDB parameter enables MongoDB client connections.
When the Cosmos DB account is created, the Azure CLI shows information similar to the following example:
{ "apiProperties": { "serverVersion": "3.6" }, "backupPolicy": { "periodicModeProperties": { "backupIntervalInMinutes": 240, "backupRetentionIntervalInHours": 8, "backupStorageRedundancy": "Geo" }, "type": "Periodic" }, "capabilities": [ { "name": "EnableMongo" } ], "connectorOffer": null, "consistencyPolicy": { "defaultConsistencyLevel": "Session", "maxIntervalInSeconds": 5, "maxStalenessPrefix": 100 }, "cors": [], "databaseAccountOfferType": "Standard", "defaultIdentity": "FirstPartyIdentity", "disableKeyBasedMetadataWriteAccess": false, "documentEndpoint": "https://<cosmosdb-name>.documents.azure.com:443/", ... < Output truncated for readability > } Connect app to production MongoDB
In this step, you connect your sample application to the Cosmos DB database you just created, using a MongoDB connection string.
Retrieve the database key
To connect to the Cosmos DB database, you need the database key. In the Cloud Shell, use the az cosmosdb keys list command to retrieve the primary key.
az cosmosdb keys list --name <cosmosdb-name> --resource-group myResourceGroup The Azure CLI shows information similar to the following example:
{ "primaryMasterKey": "RS4CmUwzGRASJPMoc0kiEvdnKmxyRILC9BWisAYh3Hq4zBYKr0XQiSE4pqx3UchBeO4QRCzUt1i7w0rOkitoJw==", "primaryReadonlyMasterKey": "HvitsjIYz8TwRmIuPEUAALRwqgKOzJUjW22wPL2U8zoMVhGvregBkBk9LdMTxqBgDETSq7obbwZtdeFY7hElTg==", "secondaryMasterKey": "Lu9aeZTiXU4PjuuyGBbvS1N9IRG3oegIrIh95U6VOstf9bJiiIpw3IfwSUgQWSEYM3VeEyrhHJ4rn3Ci0vuFqA==", "secondaryReadonlyMasterKey": "LpsCicpVZqHRy7qbMgrzbRKjbYCwCKPQRl0QpgReAOxMcggTvxJFA94fTi0oQ7xtxpftTJcXkjTirQ0pT7QFrQ==" } Copy the value of primaryMasterKey. You need this information in the next step.
Configure the connection string in your sample application
In your local repository, in config/datastores.js, replace the existing content with the following code and save your changes.
module.exports.datastores = { default: { adapter: 'sails-mongo', url: process.env.MONGODB_URI, ssl: true, }, }; The ssl: true option is required because Cosmos DB requires TLS/SSL. url is set to an environment variable, which you will set next.
In the terminal, set the MONGODB_URI environment variable. Be sure to replace the two <cosmosdb-name> placeholders with your Cosmos DB database name, and replace the <cosmosdb-key> placeholder with the key you copied in the previous step.
export MONGODB_URI=mongodb://<cosmosdb-name>:<cosmosdb-key>@<cosmosdb-name>.documents.azure.com:10250/todoapp Test the application with MongoDB
In a local terminal window, run node app.js --alter again.
node app.js --alter Navigate to http://localhost:1337 again. If you can create and see todo items, then your app is reading and writing data using the Cosmos DB database in Azure.
In the terminal, stop Node.js by typing Ctrl+C.
Deploy app to Azure
In this step, you deploy your MongoDB-connected Node.js application to Azure App Service.
Configure a deployment user
FTP and local Git can deploy to an Azure web app by using a deployment user. Once you configure your deployment user, you can use it for all your Azure deployments. Your account-level deployment username and password are different from your Azure subscription credentials.
To configure the deployment user, run the az webapp deployment user set command in Azure Cloud Shell. Replace <username> and <password> with a deployment user username and password.
- The username must be unique within Azure, and for local Git pushes, must not contain the '@' symbol.
- The password must be at least eight characters long, with two of the following three elements: letters, numbers, and symbols.
az webapp deployment user set --user-name <username> --password <password> The JSON output shows the password as null. If you get a 'Conflict'. Details: 409 error, change the username. If you get a 'Bad Request'. Details: 400 error, use a stronger password.
Record your username and password to use to deploy your web apps.
Create an App Service plan
In the Cloud Shell, create an App Service plan with the az appservice plan create command.
The following example creates an App Service plan named myAppServicePlan in the B1 pricing tier:
az appservice plan create --name myAppServicePlan --resource-group myResourceGroup --sku B1 When the App Service plan has been created, the Azure CLI shows information similar to the following example:
{ "freeOfferExpirationTime": null, "geoRegion": "UK West", "hostingEnvironmentProfile": null, "hyperV": false, "id": "/subscriptions/0000-0000/resourceGroups/myResourceGroup/providers/Microsoft.Web/serverfarms/myAppServicePlan", "isSpot": false, "isXenon": false, "kind": "app", "location": "ukwest", "maximumElasticWorkerCount": 1, "maximumNumberOfWorkers": 0, < JSON data removed for brevity. > } In the Cloud Shell, create an App Service plan with the az appservice plan create command.
The following example creates an App Service plan named myAppServicePlan in the B1 pricing tier:
az appservice plan create --name myAppServicePlan --resource-group myResourceGroup --sku B1 --is-linux When the App Service plan has been created, the Azure CLI shows information similar to the following example:
{ "freeOfferExpirationTime": null, "geoRegion": "West Europe", "hostingEnvironmentProfile": null, "id": "/subscriptions/0000-0000/resourceGroups/myResourceGroup/providers/Microsoft.Web/serverfarms/myAppServicePlan", "kind": "linux", "location": "West Europe", "maximumNumberOfWorkers": 1, "name": "myAppServicePlan", < JSON data removed for brevity. > "targetWorkerSizeId": 0, "type": "Microsoft.Web/serverfarms", "workerTierName": null } Create a web app
Create a web app in the myAppServicePlan App Service plan.
In the Cloud Shell, you can use the az webapp create command. In the following example, replace <app-name> with a globally unique app name (valid characters are a-z, 0-9, and -). The runtime is set to NODE|14-lts. To see all supported runtimes, run az webapp list-runtimes.
az webapp create --resource-group myResourceGroup --plan myAppServicePlan --name <app-name> --runtime 'NODE|14-lts' --deployment-local-git When the web app has been created, the Azure CLI shows output similar to the following example:
Local git is configured with url of 'https://<username>@<app-name>.scm.azurewebsites.net/<app-name>.git' { "availabilityState": "Normal", "clientAffinityEnabled": true, "clientCertEnabled": false, "cloningInfo": null, "containerSize": 0, "dailyMemoryTimeQuota": 0, "defaultHostName": "<app-name>.azurewebsites.net", "deploymentLocalGitUrl": "https://<username>@<app-name>.scm.azurewebsites.net/<app-name>.git", "enabled": true, < JSON data removed for brevity. > } You've created an empty web app, with git deployment enabled.
Note
The URL of the Git remote is shown in the deploymentLocalGitUrl property, with the format https://<username>@<app-name>.scm.azurewebsites.net/<app-name>.git. Save this URL as you need it later.
Create a web app in the myAppServicePlan App Service plan.
In the Cloud Shell, you can use the az webapp create command. In the following example, replace <app-name> with a globally unique app name (valid characters are a-z, 0-9, and -). The runtime is set to NODE|14-lts. To see all supported runtimes, run az webapp list-runtimes --linux.
az webapp create --resource-group myResourceGroup --plan myAppServicePlan --name <app-name> --runtime 'NODE|14-lts' --deployment-local-git When the web app has been created, the Azure CLI shows output similar to the following example:
Local git is configured with url of 'https://<username>@<app-name>.scm.azurewebsites.net/<app-name>.git' { "availabilityState": "Normal", "clientAffinityEnabled": true, "clientCertEnabled": false, "clientCertExclusionPaths": null, "clientCertMode": "Required", "cloningInfo": null, "containerSize": 0, "customDomainVerificationId": "54184270DF7B3B4BF30221B6303E789C324E4783C8DF1FBAA3D111FC72328CE9", "dailyMemoryTimeQuota": 0, "defaultHostName": "<app-name>.azurewebsites.net", "deploymentLocalGitUrl": "https://<username>@<app-name>.scm.azurewebsites.net/<app-name>.git", "enabled": true, < JSON data removed for brevity. > } You've created an empty web app, with git deployment enabled.
Note
The URL of the Git remote is shown in the deploymentLocalGitUrl property, with the format https://<username>@<app-name>.scm.azurewebsites.net/<app-name>.git. Save this URL as you need it later.
Configure an environment variable
Remember that the sample application is already configured to use the MONGODB_URI environment variable in config/datastores.js. In App Service, you inject this variable by using an app setting.
To set app settings, use the az webapp config appsettings set command in the Cloud Shell.
The following example configures a MONGODB_URI app setting in your Azure app. Replace the <app-name>, <cosmosdb-name>, and <cosmosdb-key> placeholders.
az webapp config appsettings set --name <app-name> --resource-group myResourceGroup --settings MONGODB_URI='mongodb://<cosmosdb-name>:<cosmosdb-key>@<cosmosdb-name>.documents.azure.com:10250/todoapp' DEPLOYMENT_BRANCH='main' Note
DEPLOYMENT_BRANCH is a special app setting that tells the deployment engine which Git branch you're deploying to in App Service.
Push to Azure from Git
-
Since you're deploying the
mainbranch, you need to set the default deployment branch for your App Service app tomain(see Change deployment branch). In the Cloud Shell, set theDEPLOYMENT_BRANCHapp setting with theaz webapp config appsettings setcommand.az webapp config appsettings set --name <app-name> --resource-group myResourceGroup --settings DEPLOYMENT_BRANCH='main' -
Back in the local terminal window, add an Azure remote to your local Git repository. Replace <deploymentLocalGitUrl-from-create-step> with the URL of the Git remote that you saved from Create a web app.
git remote add azure <deploymentLocalGitUrl-from-create-step> -
Push to the Azure remote to deploy your app with the following command. When Git Credential Manager prompts you for credentials, make sure you enter the credentials you created in Configure a deployment user, not the credentials you use to sign in to the Azure portal.
git push azure mainThis command may take a few minutes to run. While running, it displays information similar to the following example:
Enumerating objects: 5, done. Counting objects: 100% (5/5), done. Delta compression using up to 8 threads Compressing objects: 100% (3/3), done. Writing objects: 100% (3/3), 318 bytes | 318.00 KiB/s, done. Total 3 (delta 2), reused 0 (delta 0), pack-reused 0 remote: Updating branch 'main'. remote: Updating submodules. remote: Preparing deployment for commit id '4eb0ca7190'. remote: Generating deployment script. remote: Running deployment command... remote: Handling node.js deployment. remote: Creating app_offline.htm remote: KuduSync.NET from: 'D:\home\site\repository' to: 'D:\home\site\wwwroot' remote: Copying file: 'package.json' remote: Deleting app_offline.htm remote: Looking for app.js/server.js under site root. remote: Using start-up script app.js remote: Generated web.config. . . . remote: Deployment successful. To https://<app-name>.scm.azurewebsites.net/<app-name>.git * [new branch] main -> main
Tip
During Git deployment, the deployment engine runs npm install --production as part of its build automation.
- As defined in
package.json, thepostinstallscript is picked up bynpm installand runsng buildto generate the production files for Angular and deploy them to the assets folder. -
scriptsinpackage.jsoncan use tools that are installed innode_modules/.bin. Sincenpm installhas installednode_modules/.bin/ngtoo, you can use it to deploy your Angular client files. This npm behavior is exactly the same in Azure App Service. Packages underdevDependenciesinpackage.jsonare not installed. Any package you need in the production environment needs to be moved underdependencies.
If your app needs to bypass the default automation and run custom automation, see Run Grunt/Bower/Gulp.
Enumerating objects: 5, done. Counting objects: 100% (5/5), done. Delta compression using up to 8 threads Compressing objects: 100% (3/3), done. Writing objects: 100% (3/3), 347 bytes | 347.00 KiB/s, done. Total 3 (delta 2), reused 0 (delta 0), pack-reused 0 remote: Deploy Async remote: Updating branch 'main'. remote: Updating submodules. remote: Preparing deployment for commit id 'f776be774a'. remote: Repository path is /home/site/repository remote: Running oryx build... remote: Operation performed by Microsoft Oryx, https://github.com/Microsoft/Oryx remote: You can report issues at https://github.com/Microsoft/Oryx/issues remote: remote: Oryx Version: 0.2.20210420.1, Commit: 85c6e9278aae3980b86cb1d520aaad532c814ed7, ReleaseTagName: 20210420.1 remote: remote: Build Operation ID: |qwejn9R4StI=.5e8a3529_ remote: Repository Commit : f776be774a3ea8abc48e5ee2b5132c037a636f73 . . . remote: Deployment successful. remote: Deployment Logs : 'https://<app-name>.scm.azurewebsites.net/newui/jsonviewer?view_url=/api/deployments/a6fcf811136739f145e0de3be82ff195bca7a68b/log' To https://<app-name>.scm.azurewebsites.net/<app-name>.git 4f7e3ac..a6fcf81 main -> main
Tip
During Git deployment, the deployment engine runs npm install as part of its build automation.
- As defined in
package.json, thepostinstallscript is picked up bynpm installand runsng buildto generate the production files for Angular and deploy them to the assets folder. -
scriptsinpackage.jsoncan use tools that are installed innode_modules/.bin. Sincenpm installhas installednode_modules/.bin/ngtoo, you can use it to deploy your Angular client files. This npm behavior is exactly the same in Azure App Service. When build automation is complete, the whole completed repository is copied into the/home/site/wwwrootfolder, out of which your app is hosted.
If your app needs to bypass the default automation and run custom automation, see Run Grunt/Bower/Gulp.
Browse to the Azure app
Browse to the deployed app using your web browser.
https://<app-name>.azurewebsites.net If you can create and see todo items in the browser, then your sample app in Azure has connectivity to the MongoDB (Cosmos DB) database.
Congratulations! You're running a data-driven Node.js app in Azure App Service.
Update data model and redeploy
In this step, you change the Todo data model and publish your change to Azure.
Update the server-side model
In Sails.js, changing the server-side model and API code is as simple as changing the data model, because Sails.js already defines the common routes for a model by default.
In your local repository, open api/models/Todo.js and add a done attribute. When you're done, your schema code should look like this:
module.exports = { attributes: { value: {type: 'string'}, done: {type: 'boolean', defaultsTo: false} }, }; Update the client code
There are three files you need to modify: the client model, the HTML template, and the component file.
Open client/src/app/todo.ts and add a done property. When you're done, your model show look like this:
export class Todo { id!: String; value!: String; done!: Boolean; } Open client/src/app/app.component.html. Just above the only <span> element, add the following code to add a checkbox at the beginning of each todo item:
<input class="form-check-input me-2" type="checkbox" [checked]="todo.done" (click)="toggleDone(todo.id, i)" [disabled]="isProcessing"> Open client/src/app/app.component.ts. Just above the last closing curly brace (}), insert the following method. It's called by the template code above when the checkbox is clicked and updates the server-side data.
toggleDone(id:any, i:any) { console.log("Toggled checkbox for " + id); this.isProcessing = true; this.Todos[i].done = !this.Todos[i].done; this.restService.updateTodo(id, this.Todos[i]) .subscribe((res) => { console.log('Data updated successfully!'); this.isProcessing = false; }, (err) => { console.log(err); this.Todos[i].done = !this.Todos[i].done; }); } Test your changes locally
In the local terminal window, compile the updated Angular client code with the build script defined in package.json.
npm run build Test your changes with node app.js --alter again. Since you changed your server-side model, the --alter flag lets Sails.js alter the data structure in your Cosmos DB database.
node app.js --alter Navigate to http://localhost:1337. You should now see a checkbox in front of todo item. When you select or clear a checkbox, the Cosmos DB database in Azure is updated to indicate that the todo item is done.

In the terminal, stop Node.js by typing Ctrl+C.
Publish changes to Azure
In the local terminal window, commit your changes in Git, then push the code changes to Azure.
git commit -am "added done field" git push azure main Once the git push is complete, navigate to your Azure app and try out the new functionality.

If you added any articles earlier, you still can see them. Existing data in your Cosmos DB is not lost. Also, your updates to the data schema and leaves your existing data intact.
Stream diagnostic logs
While your Node.js application runs in Azure App Service, you can get the console logs piped to your terminal. That way, you can get the same diagnostic messages to help you debug application errors.
To start log streaming, use the az webapp log tail command in the Cloud Shell.
az webapp log tail --name <app-name> --resource-group myResourceGroup Once log streaming has started, refresh your Azure app in the browser to get some web traffic. You now see console logs piped to your terminal.
Stop log streaming at any time by typing Ctrl+C.
To access the console logs generated from inside your application code in App Service, turn on diagnostics logging by running the following command in the Cloud Shell:
az webapp log config --resource-group <resource-group-name> --name <app-name> --docker-container-logging filesystem --level Verbose Possible values for --level are: Error, Warning, Info, and Verbose. Each subsequent level includes the previous level. For example: Error includes only error messages, and Verbose includes all messages.
Once diagnostic logging is turned on, run the following command to see the log stream:
az webapp log tail --resource-group <resource-group-name> --name <app-name> If you don't see console logs immediately, check again in 30 seconds.
Note
You can also inspect the log files from the browser at https://<app-name>.scm.azurewebsites.net/api/logs/docker.
To stop log streaming at any time, type Ctrl+C.
Manage your Azure app
Go to the Azure portal to see the app you created.
From the left menu, click App Services, then click the name of your Azure app.

By default, the portal shows your app's Overview page. This page gives you a view of how your app is doing. Here, you can also perform basic management tasks like browse, stop, start, restart, and delete. The tabs on the left side of the page show the different configuration pages you can open.

Clean up resources
In the preceding steps, you created Azure resources in a resource group. If you don't expect to need these resources in the future, delete the resource group by running the following command in the Cloud Shell:
az group delete --name myResourceGroup This command may take a minute to run.
Next steps
What you learned:
- Create a MongoDB database in Azure
- Connect a Node.js app to MongoDB
- Deploy the app to Azure
- Update the data model and redeploy the app
- Stream logs from Azure to your terminal
- Manage the app in the Azure portal
Advance to the next tutorial to learn how to map a custom DNS name to the app.
Or, check out other resources:
- Configure Node.js app
- Environment variables and app settings reference
Feedback
Mongoose Database Name Must Be a String
Source: https://docs.microsoft.com/en-us/azure/app-service/tutorial-nodejs-mongodb-app